-
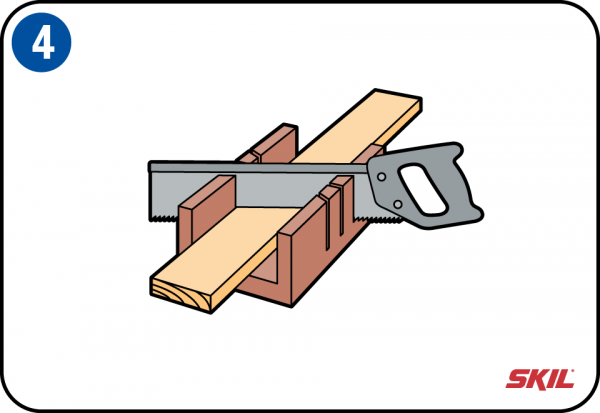
Mitre box
The cheapest solution to make beveled cuts is to use a simple mitre box. This is usually made of plastic or wood, and has slots for sawing at an angle of 45° or 90°. There are also mitre boxes with more slots at a greater choice of angles. Use a fine-toothed back saw with a broad blade, and clamp the piece of wood that you want to saw to the back of the mitre box. The relatively narrow mitre box shown is suitable for smaller jobs such as sawing strips of wood for a picture frame and other smaller pieces of wood.
-
Mitre sawing with a fixed guide
With this tool the saw is fixed to a horizontal bar or guide. The angle between the workpiece and the saw can be set accurately to angles of 22.5°, 30°, 45°, 60° and 90°. The saw blade can easily be replaced when it is worn out.
-
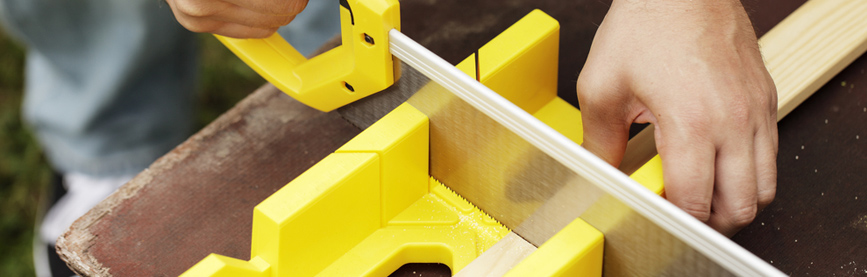
Electric mitre saw
The most convenient and quickest way to make bevel cuts is with an electric mitre saw. With this saw you aren’t limited in the width of the workpiece. The speed of these saws can be adjusted steplessly, and they also have a vacuum cleaner connection for dust extraction.
-
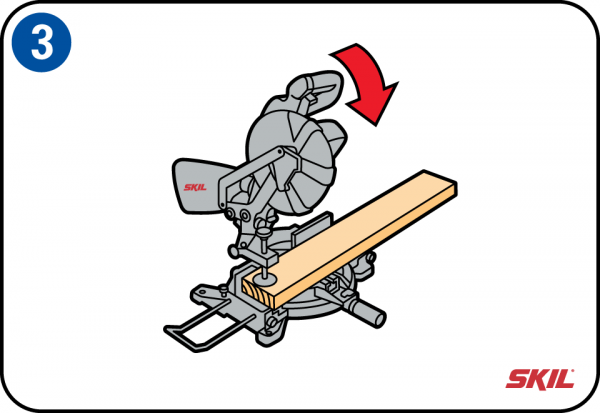
Working with a mitre saw
If you want to saw a beam or a plinth, first measure the place of the cut accurately and mark it with a pencil line.
Set the saw to the required angle and clamp the workpiece in place, for example using a gluing clamp. If you’re not sure of the exact angle you need, first make a trial cut with a piece of waste wood.
Before sawing first check that your saw blade is sharp, otherwise there will be a lot of splintering of the material and you’ll have to use too much force. Fine-tooth saw blades give the best results. -
Step tip
If the saw sticks frequently, rub the end of a candle over the saw blade. The candle wax will allow you to saw smoothly. -
Sawing width
The maximum sawing width or depth with an electric mitre saw depends on the diameter of the blade. The maximum sawing width is equal to the diameter of the blade, which is usually 250 mm. The electric mitre saw may have two saw guides. These allow you to pull the saw towards you for a greater sawing width.
-
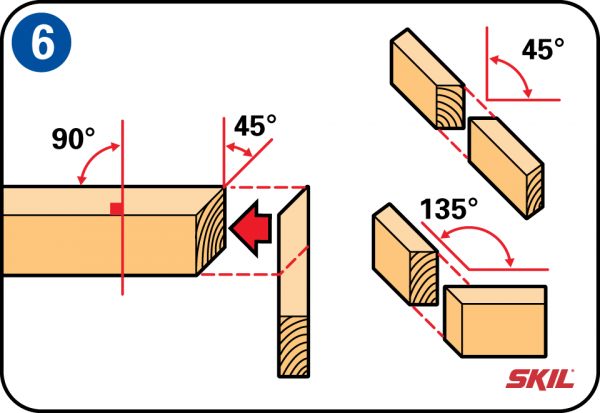
Sawing
Measure the bevel angle, for example using a mitre square. If the two pieces of wood are at right-angles to each other, the angle is 90°. In this case the two bevel angles you need to saw are each 45°. With a mitre box you have the choice of sawing at an angle of 45° to the left or to the right. For the best visual appearance, make sure that the same sides of the workpiece will be visible at the inside and outside of the finished joint. If you’re used to making bevel cuts you can also use an in-line bevel joint to connect two pieces of wood to extend the length. The two planks or plinths will then join together neatly.
-
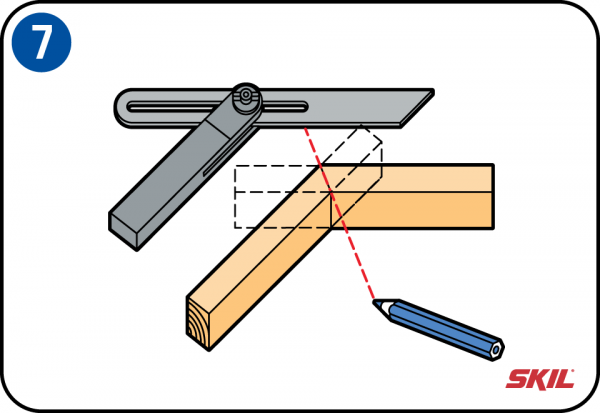
Variable bevel angles
By using variable bevel angles you make a joint at any desired angle. For non-standard angles you can make a neat joint by measuring the desired bevel angle with an adjustable mitre square or contour template. Set the mitre square to exactly half this angle and mark this out on each workpiece. Then set the mitre saw at the same angle and you’ll be able to make a neatly finished joint.